This is a blog filled with wonderful surprises that I am giving to you ... FOR FREE, just to help you get your Visiting Teaching done each month. It's a present for you every single month! Make sure to check out my other blog too at http://visitingteachingtips.blogspot.com for other Great Visiting Teaching and Relief Society oriented ideas!


Tuesday, October 12, 2010

Visiting Teaching Motto Bookmark

This is my very own motto, that I loved so much when I first started blogging about Visiting Teaching about 4 years ago.  I  thought it was about time that I took James E. Faust's quote and put it into a bookmark. 

This isn't the official R.S. motto, as that is Charity never faitheth."  When I was reading the talk that this quote came from, which can be found on my other blog, I loved so much the message and decided that this is how I felt about Visiting teaching and added it to my blog at that time.

I made these is fall colors, so that you can give it out anytime this fall, or even in the winter.  I made each one different so they will be fun for you to pick which design is your favorite.

Enjoy!  Katie G.

Thursday, October 7, 2010

You have been Boo'd

I love Halloween, partly because it is my birthday month, but because it lots of fun.  I love to decorate my home and even dress up in my old age, to greet the trick or treaters.  I must be crazy, but I am sure having fun.  So... I created my own "You have been Boo'd" flyer to go out when you take treats to your neighbors and friends.  You are welcome to use mine if you like.  You might want to start with those you visit teach!  ( but don't count that as your visit!  Ha, ha!)   Enjoy!!!  Katie G
P.S. I had forgotten about my other storage blog that goes with this one, and accidentally started posting this Halloween handout in that one.  I thought I had better remind you too since I am the one who created it and forgot about it.  Here is the link to see the things that are in it!  http://visitingteachingsurprisedocuments.blogspot.com/


My Sweet Son Andy, who is my computer guru, came over and fixed what was wrong with my internet that would not let me insert any photos on my blog.  It took him less than a minute.  Am I ever grateful for him, and you should be too.  What is this blog without all the images that I put on it for you to download.  Thanks, Andy!!!!  Happy Halloweening.... Katie G.


I have been asked about whether or not people can  use popcorn with the caramel recipe and I have said yes but....if you use it with puff corn, I can guarantee you that it will be gobbled up so fast, your head will spin.  Everywhere I have ever taken it, people love it.  There is a recipe on the back on one of the different brands bags of puff corn, but it just isn't like my caramel, but it is pretty good too. I recommend my caramel recipe.  I also recommend that you try the puff corn and see if you agree about how yummy it is.  One tip though.... caramel corn can really set up fast, and you want to be able to keep it as soft as possible.  You could cook it about a minute or two less, but what you need to do is to put it immediately into plastic bags, so it stays as soft as possible.  Oh and with popcorn... you can never get all the hard kernels out, and you about break your teeth chewing into one.  Puff corn is so soft it will about melt in your mouth and the chewieness will come from the caramel.  SOOOOOOO Good.  Here are a couple of different brands of puff corn that I found on the internet:

Tuesday, October 5, 2010

Bookmarks,Service and President Monson

Ok, ok, I do like bookmarks.  I love creating them, and I love even more giving them out to others.  So here you go.... if you want another cute bookmark for whatever occasion, go to my Visiting teaching tips blog or here is the direct link to that particular post.... http://visitingteachingtips.blogspot.com/2010/10/what-have-i-done-for-someone-today.html Enjoy!  Love, Katie G.

Sunday, October 3, 2010

Two Printable Note Cards

"You are Loved" and "Thank-you" cards by Katie G.
I had occasion to need some greeting cards to give to some people this week.  I thought that I would share them with you as well.  Print them off on a white sheet of card stock.  You will get two cards per one 8 x 10 and when you cut them in half, where the white space is between them, they will fit into a note card size envelop.  I buy my note card envelopes from Office Max or Office Depot, but I have seen them from time to time at Walmart.  The top card I am giving to a friend who has had a death in her family, but you could use it just to let those sisters you visit, know that they are loved. 

My sister who lives in another state sends a card faithfully to a sister that she was asked to Visit teach years ago.  This woman, does not want Visiting or Home teachers, but she was still assigned to my sister.  I admire my sister Becky who has for years, sent a letter or card and message to this sister every single month.  We spoke of it once over the phone and Becky said, "I will never know if keeping in contact with this sister in this way will ever impact her or get her back into activity in the church, but she will know that there is someone who cares for her."  Becky went on to say, "I don't know if she even reads my letters or cards, or just throws them in the garbage when they arrive."

The bottom card is a thank-you card that I was sending to the woman who hosted our Young Women's Alice in Wonderland tea party.  It turned out so lovely and this woman spent so much time in decorating, setting up, cooking and on.  I wanted to send her a customized card and you will notice that the image on the card is a public domain image from one of the illustrated versions of Alice in Wonderland.  I thought it was perfect, but the card is perfect for a Thank-you for anyone.

I hope you enjoy this printable.  Please comment below if you use it as I do like to feel like my efforts are appreciated.  Share the Love!  Katie G.

Saturday, October 2, 2010

A new Halloween Surprise for you!


Happy Halloween Surprise box template

Halloween template
Well, I have been wanting to draw up my own template for a cute and easy printable gift box.  I have used and posted others, but I wanted to see if I  could do it.... and I did!!!!  It took me the whole day to get it right, but I finally have a cute template for you.  I have printed off several of these and they are adorable.  I put the directions on the printout, but when I put them together, I thought that if I were to file the edges of the Happy Halloween tag, it would look even cuter.  It certainly did.  I then filed the edge of the sticker and it looked even better too. So I took it even one step further and sanded the box folds, and yes, it looked that much cuter!!!  I think I will now tie a cute bow on the top and find something yummy to fill it up with.  By the way, if you didn't already know, Xpedex sells all different kinds of cellophane and plastic bags from really tiny to pretty large.  I like the looks of the cellophane ones the best, but rather than put your goodies right into the box, and tie it shut with a bow. ( You could leave the box flap open and that would look really cute.)   I would line the box with a baggie... oh yea, even a sandwich baggie would work.  I will take a photo of the finished project in a couple of hours, but for now... here is the templates for side one and side two.  Enjoy!!  Katie G.
Inside of box.

Wednesday, September 29, 2010

A great fall or winter thoughtful little gift for your sisters or a friend.

I got my blogs mixed up and posted a cute idea for gift giving to those you visit teach sometime this fall or winter.  Anyway, you will have to go back to this link http://visitingteachingtips.blogspot.com/2010/09/great-fall-visiting-teaching-gift.html  to see what it is, but if you want to visit the entire blog, then click on the link just below the header or banner at the top of this page and it will take you do that blog.  It is actually the master blog and this blog is just the ideas and creative things for little gift giving, handouts and such.  I call this blog my "Storage Unit" for my other blog.  Anyway... enjoy both blogs, and don't forget to leave a comment.  Your comments make me feel loved! 

Best regards, and Happy Visiting Teaching.... Love, Katie G.

Monday, September 20, 2010

Alice in Wonderland Mad Hatter Tea Party Invitaion


This is the finished invitation.
 
All the materials cut out and ready to assemble the invitation.
I am inserting the invitation first followed by the other separate pages of the invitation.  I have posted the pages so that you can fill in the blanks, to customize for your own use.  I am using black card stock for the front and back cover for this book/card/invitation. Cut the black card stock in half which is 5.5 inches.  Fold each of those in half for the cover.
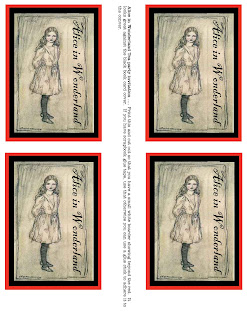
This image to the left is what you print off, cut out and glue to the front book cover.  Now you will need to paste the cute cover picture on the front of the black book card cover.  Make sure to center it between the binding tape and the right hand edge of the black paper cover. I used white duct tape to look like binding and to cover up the staples, but I think I am going to go to the store and see if I can find some cute decorated duct tape instead of just a plain white duct tape binding. 

The next step is to print the inside pages  1 - 4.  Cut them out.  If you are going to make a lot of these invitations, I highly suggest you purchase a cutter, as it makes the cuts straight and looks so much better.  Takes far less time than cutting out things by hand.  Then collate the pages 1 - 4 and insert into the folded black card stock cover.  Staple as close to the edge of the fold on the book cover as you can.  Using a strip of duct tape, place over the staples and over fold so that it covers both the front and backside.  (see the photo)
 

Now for the bookmark................... Print the bookmark page on white card stock.  I just my card stock at Walmart in a ream, because it is firm enough for cards, but not too firm to give me problems running it through my printer.  I wanted my bookmarks to be two sided.  The black and white printed paper below I found at Shabby Princess Paper and printed it on the back side of my bookmark page.  You might want it to just use solid black but either way it goes great with the invitation. 


Bookmark
 The next step is to cut out the bookmark, so that a boarder of black is showing all the way around and then punch a hole in the top.  I then cut a piece of Red ribbon, folded it in half and threaded the folded side through the back to the front side of the punched hole, then put the two ends through the folded ribbon loop and pulled it tight.  I slipped this completed bookmark in the center pages of the book with the ribbon hanging out.  I was thinking that a black and white polka dot or checked ribbon would be really cute instead of the red, but red is what I have.   

 The paper below was designed by Shabby Princess and Sara Carling called "Dinner Party." The link to Shabby princess is:   http://www.shabbyprincess.com/   At the Shabby Princess site, you need to stay for a while because she has great scrap booking products and offers a bunch of really nice looking ones for her blog visitors to use for free.  Very, Very generous!!! Just click on "downloads" and a whole bunch of complete digital packs will be displayed and you will really be amazed at just how pretty her freebies are!!!   I am using this paper as the backside of the  book mark as well as the page before page one and after page 4... just because it looks nice and gives an extra page to make it look more like a vintage book. 


I just wanted to tell you why I include on the invitation the link found on page 4 to Project Gutenberg's site that has several Alice in Wonderland books, with different illustrators.  I found out that the Young Women really love to read, and some of them read several books a week.  I personally am not fond of the Alice in wonderland book, but it is a classic, and Project Gutenberg has spent countless hours digitizing so many wonderful classics (vintage books) for people to access and read online.  We are trying to get the Youth to do productive things online instead of playing games, and just surfing the net, so I thought this would be a very worthwhile link to post on the invitation. I wonder how many parents know about Project Gutenberg?  Here is the link to this wonderful site loaded with tons of free ebooks to read.  http://www.gutenberg.org/wiki/Main_Page  I love to pass on good tips, so take this one and pass it on to those you visit teach and give them a bookmark while you are at it.
I will be designing some place cards, and a Mad Hatter Hat favor in the next few days, so come back and I will have the templates and images of them as well.
Enjoy!
Katie G.

I just finished the name tags to be put on the table at the tea party and they turned out really cute as you can see in the picture.  They are so easy, so not template for these.  I have below this image the cute little tag that is hanging from the side of the favor box.  This box I found at my local $ store for 8 of them only $1.  They are pink.  They will be filled with "English Toffee" and set by each table setting.  This party is really going to be cute and fun.  Oh the teapot that is behind my cute little printouts, is one that I purchased online because I wanted a very special and very cute one to have tea parties with my little Granddaughters.  I think this one really fits the bill!

Enjoy!!!  Katie G.
 P.S.  So just when I think I am done creating things for this party, I remember the hostess wanted to have some 2 sided menus to be displayed on each table.  So below is what I came up with.  In keeping with the Alice in Wonderland theme, I named all the different foods, with names from the Story.  It turned out pretty cute. 

You know what they say about old friends and antiques? They grow more valuable with time.

Glad that you dropped by my blog!

This blog and it's contents go hand in hand with my Visiting Teaching Tips and handouts blog found at http://visitingteachingtips.blogspot.com/ If you by accident get to this blog first, make sure to go back to the other one and see all that there is for you there. This is sort of my overflow or stroage blog because I can't keep everything there, so I add my creations to this storage unit and that is my Visiting Teaching Surprise for you. Sometimes however, I do put in things that I think you would enjoy even if they aren't specifically related to Visiting Teaching, but my vision in life is that if I take all the time to make things, I may as well share them and get more use out of them. Sorta like hand me downs but brand new "Down loads". I hope you enjoy these freebies. Drop me a note to say hello in the comments under the downloads posts.